Merchant Presented QRC
API Endpoints Mentioned in this Guide:
Merchant-Presented QR Code Payment Scenario: In-Store User Workflows and API Interactions
This scenario describes the steps involved in a merchant-presented QR Code payment process, typically used in an in-store retail environment with a Point-of-Sale (POS) system.
-
Customer Initiation:
- A customer approaches the checkout area managed by the POS manager, ready to pay for their selected items.
-
Choosing the Payment Method:
- When asked for a payment method, the customer opts to pay using a digital wallet.
-
Generating QR Code:
- The POS manager selects "Digital Wallet" as the payment type. Subsequently, the POS system calls Pockyt’s /create-trans-qrcode API to generate a QR Code for the transaction.
POST: https://mapi.yuansfer.com/app-instore/v3/create-trans-qrcode- The generated QR Code, along with a transaction number, is displayed on a screen facing the customer.
-
Scanning QR Code:
- The customer uses their digital wallet app to scan the QR Code displayed by the merchant.
-
Customer Confirmation:
- Before finalizing the payment, the customer is prompted on their digital wallet app to confirm or cancel the transaction.
-
Processing and Notification:
- Following the customer's confirmation, the digital wallet server processes the payment and notifies Pockyt of the transaction outcome, along with the transaction number.
-
learn more about handling payment notifications here:
-
- Pockyt then communicates the results from the wallet service back to the merchant’s POS system through an Instant Payment Notification (IPN) callback.
- Following the customer's confirmation, the digital wallet server processes the payment and notifies Pockyt of the transaction outcome, along with the transaction number.
-
Finalizing the Transaction:
- The POS system prints a receipt for the customer, marking the completion of the transaction process.
This workflow demonstrates the integration and interaction of Pockyt’s APIs in facilitating merchant-presented QR Code payments, offering a secure and convenient payment method for both customers and merchants. For more details on setting up IPN callbacks, refer to the tutorial section provided.
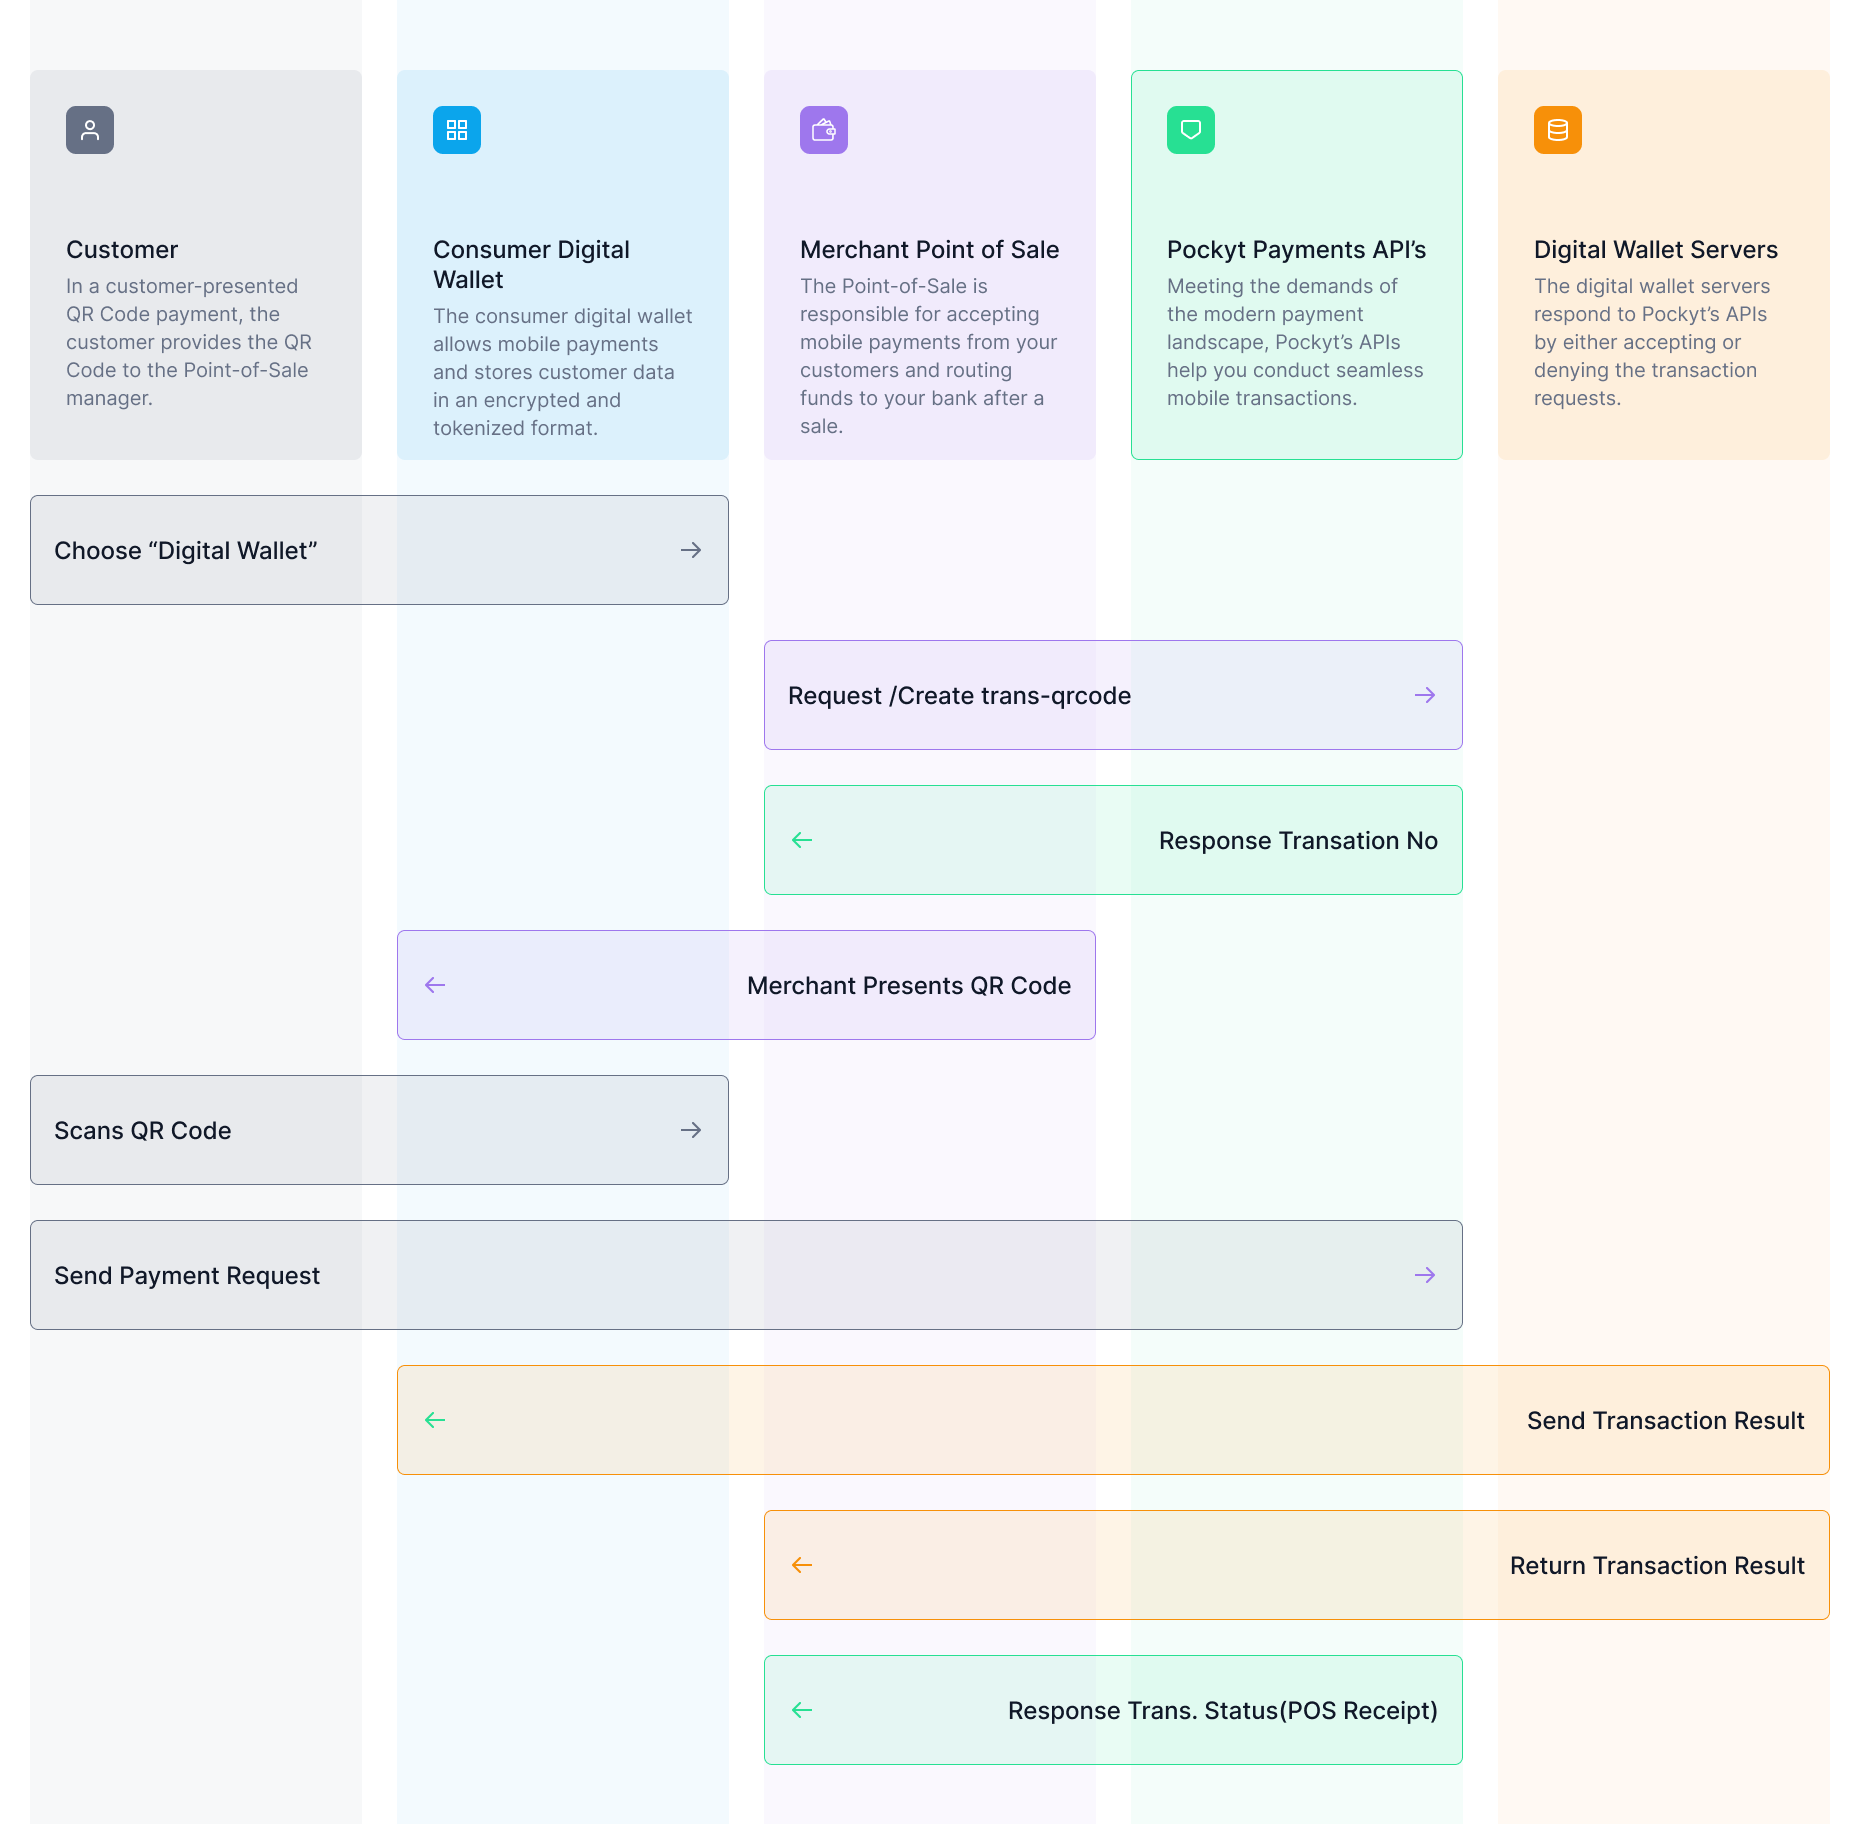
Below are the steps of the transaction itinerary in a merchant-presented QR Code payment.
- A customer approaches the Point-of-Sale (POS) manager presiding over a customer checkout within an in-store retail environment.
- Upon inquiry, the customer reveals that they want to make the payment for the purchased items via a digital wallet.
- The POS manager selects “Digital Wallet” as the tender type and the POS system calls Pockyt’s /create-trans-qrcode API to generate the QR Code.
POST: https://mapi.yuansfer.com/app-instore/v3/create-trans-qrcode
curl -XPOST -H "Content-type: application/json" -d '{
    "merchantNo": "200043",
    "storeNo": "300014",
    "verifySign": "45bfac0286debaf0c316c011d6842d2c",
    "amount": "0.11",
    "currency": "USD",
    "settleCurrency": "USD",
    "needQrcode" "true",
    "reference": "test2020102023",
    "ipnUrl": "<http://zk-tys.yunkeguan.com/login/test">,
    "needQrcode": "true",
    "vendor": "alipay",
    "timeout": "120"
}' '<https://mapi.yuansfer.com/app-instore/v3/create-trans-qrcode'>
The Pockyt endpoint generates the QR Code along with a transaction no. that appears on a customer-facing display.
- The customer opens their digital wallet app and scans the merchant’s QR Code to make the payment. However, before the payment is processed, the customer encounters a UI prompting them to confirm (or cancel) the transaction.
- Upon confirmation, the digital wallet server processes the payment and alerts Pockyt with the transaction result along with a transaction number.
- Pockyt relays the processing results from the wallet service to the merchant’s Point- of-Sale via IPN callback.
See tutorial section on how to configure your IPN callback settings
- The Point-of-Sale generates a customer receipt marking the end of the transaction.
Updated about 1 year ago